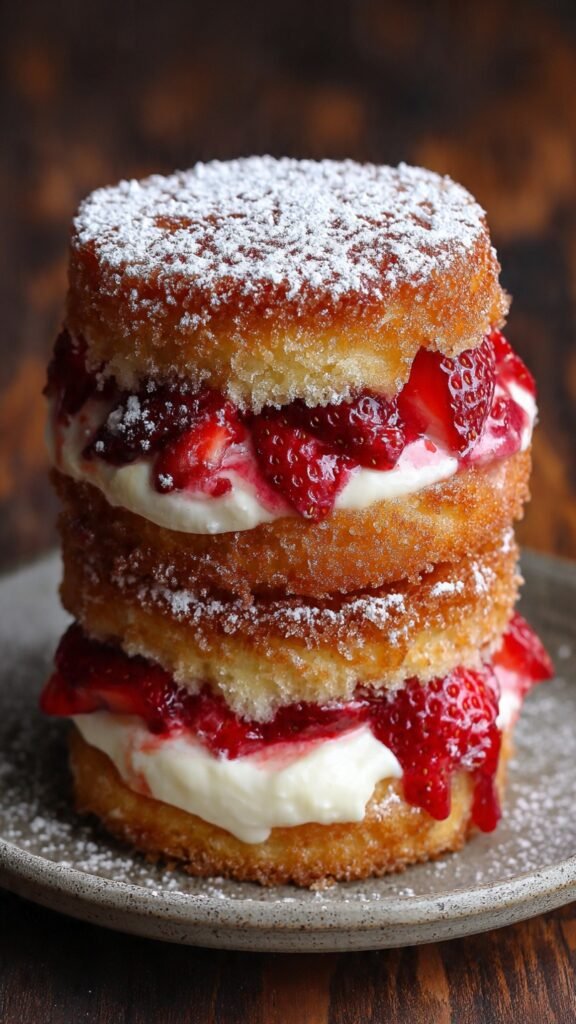
Fried Strawberry Cheesecake Sandwiches (Crispy, Creamy Decadence in Every Bite!)

The moment you bite through the crispy, golden exterior of these sandwiches and hit that luscious cream cheese filling studded with juicy strawberries, you’ll understand why this recipe has taken over breakfast tables and dessert menus everywhere. It’s like someone took everything we love about cheesecake, stuffed it between slices of buttery brioche, and transformed it into the most indulgent handheld treat imaginable.
I first made these on a lazy Sunday morning when I wanted something special but didn’t have the patience for a full cheesecake. What started as an experiment turned into an instant family favorite—my kids now request these for birthday breakfasts, and guests always ask for the recipe when I serve them at brunch gatherings. The contrast between the warm, crispy bread and the cool, creamy filling creates a texture experience that’s absolutely addictive.
You’ll get restaurant-quality fried sandwiches with a perfectly golden crust, a rich cheesecake-style filling that stays creamy even when warm, and bursts of fresh strawberry flavor in every single bite. Whether you’re making them for a special breakfast, an impressive dessert, or an afternoon indulgence, these take just 20 minutes from start to finish.
Table of Contents
Prep Time: 10 min | Cook Time: 10 min | Total: 20 min
Yield: 4 sandwiches (4 servings) | Difficulty: Easy
Quick Stats Box:
- Cuisine: American Fusion
- Course: Breakfast / Dessert / Brunch
- Diet: Vegetarian
- Best for: Special breakfasts, brunch parties, dessert indulgence, weekend treats
Why This Recipe Works
- Restaurant dessert at home — Tastes like a gourmet creation but uses simple pantry ingredients
- Texture perfection — Crispy golden exterior meets impossibly creamy filling with juicy strawberry bursts
- Ready in 20 minutes — Faster than making pancakes and infinitely more impressive
- Double duty delicious — Works equally well as an indulgent breakfast or elegant dessert
- Customizable sweetness — Control the sugar level in both the filling and coating to suit your taste
Ingredient Spotlight
Brioche or Challah Bread: The Foundation
Thick-cut brioche or challah bread is essential for this recipe because the slightly sweet, buttery crumb can withstand frying without falling apart. These enriched breads also create a tender interior that contrasts beautifully with the crispy exterior. Texas toast or thick white bread works in a pinch, but bakery-fresh brioche delivers the best results.
Cream Cheese: The Star
Full-fat cream cheese that’s been softened to room temperature whips into a smooth, spreadable filling that mimics real cheesecake. The room temperature step is non-negotiable—cold cream cheese will be lumpy and difficult to spread. This creates the signature creamy center that stays luscious even when warmed through.
Fresh Strawberries vs. Jam
Using both fresh sliced strawberries AND strawberry jam or preserves creates layers of strawberry flavor—the fresh berries provide juicy texture while the jam adds concentrated sweetness and helps bind everything together. This combination ensures you get strawberry in every bite rather than pockets of fruit.
Ingredients
For the Cheesecake Filling:
- 8 oz cream cheese, softened to room temperature
- ¼ cup powdered sugar
- 1 teaspoon vanilla extract
- 2 tablespoons heavy cream (optional, for extra creaminess)
For the Sandwiches:
- 8 slices thick brioche or challah bread
- 1 cup fresh strawberries, thinly sliced
- ½ cup strawberry jam or preserves
- 2 tablespoons butter (for frying)
For the Coating:
- 2 large eggs, beaten
- ¼ cup milk
- ½ cup all-purpose flour
- ½ teaspoon ground cinnamon
- ¼ teaspoon salt
- ¼ cup granulated sugar (for coating)
- Powdered sugar (for dusting before serving)
Ingredient Notes:
- Quality matters most: Use real cream cheese (not whipped or low-fat) and bakery-fresh brioche for superior texture
- Room temperature is key: Cream cheese must sit at room temperature for at least 1 hour to whip smooth and spreadable
- Don’t skip: Fresh strawberries in addition to jam—they provide essential texture contrast and fresh flavor
Essential Equipment
You’ll Need:
- Large non-stick skillet — 12-inch size allows you to cook 2 sandwiches at once
- Mixing bowls — Medium bowl for cream cheese filling, shallow bowls for coating stations
- Electric mixer or whisk — For whipping cream cheese to smooth perfection
- Sharp bread knife — For cutting thick, even slices if not pre-sliced
- Paper towels — For draining excess butter after frying
Nice to Have:
- Offset spatula — Makes spreading cream cheese filling easier and more even
- Fine mesh sieve — For dusting powdered sugar beautifully over finished sandwiches
How to Make Fried Strawberry Cheesecake Sandwiches (Step-by-Step)
Step 1: Whip the Cheesecake Filling
In a medium mixing bowl, combine the softened cream cheese, powdered sugar, and vanilla extract. Beat with an electric mixer or whisk vigorously until completely smooth, light, and fluffy—this takes about 2-3 minutes. You’ll know it’s ready when there are absolutely no lumps and the mixture looks pale and airy. If you want extra creaminess, add the heavy cream and beat for another minute until incorporated. Pro tip: The cream cheese must be at room temperature or you’ll get lumps no matter how long you beat it.
Step 2: Assemble the Sandwiches
Lay out 4 slices of brioche on a clean work surface. Spread the cream cheese mixture generously and evenly on each slice, leaving a small ¼-inch border around the edges to prevent oozing during frying. Layer the thinly sliced fresh strawberries in a single, even layer over the cream cheese. Spread about 2 tablespoons of strawberry jam over the strawberries on each sandwich. Top with the remaining 4 slices of bread and press down gently but firmly to seal everything together. Pro tip: The jam acts as an edible glue that helps keep the filling from sliding out during cooking.
Step 3: Prepare the Coating Stations
Set up your coating stations for efficient dipping. In one shallow bowl, whisk together the flour, cinnamon, and salt. In a second shallow bowl, beat together the eggs and milk until well combined. Have a plate ready with the granulated sugar for the final coating. This three-step coating process creates an incredibly crispy, flavorful exterior.
Step 4: Coat the Sandwiches
Working with one sandwich at a time, first dip it into the egg mixture, turning carefully to coat both sides completely. Let excess egg drip off, then dredge the sandwich in the flour mixture, pressing gently so it adheres to both sides. The coating should be even and complete—any bare spots will get soggy instead of crispy. Pro tip: Use one hand for wet coating and one for dry to avoid a gloppy mess on your fingers.
Step 5: Fry to Golden Perfection
Melt 1 tablespoon of butter in your large non-stick skillet over medium heat. Wait for the butter to foam slightly but not brown—this is the perfect frying temperature. Carefully place 2 coated sandwiches in the skillet without crowding. Fry for 2-3 minutes on the first side, watching for a deep golden-brown color. Flip gently with a wide spatula and cook the second side for another 2-3 minutes until equally golden and crispy. The filling should be warm and slightly melty, and you’ll see the edges starting to ooze just a bit. Remove to a paper towel-lined plate to drain excess butter. Repeat with remaining sandwiches, adding more butter as needed.
Step 6: Sugar and Serve
While still warm, sprinkle the fried sandwiches with granulated sugar on both sides. Just before serving, dust generously with powdered sugar using a fine mesh sieve for that bakery-style finish. Serve immediately while the outside is crispy and the inside is warm and creamy. Pro tip: These are best enjoyed within 5 minutes of frying when the contrast between crispy and creamy is at its peak.
Expert Tips & Tricks
Temperature Matters: Medium heat is crucial—too high and the bread burns before the filling warms; too low and you get greasy, soggy sandwiches instead of crispy ones.
Don’t Rush the Cream Cheese: Let it sit at room temperature for a full hour before mixing to guarantee a smooth, lump-free filling.
The Secret to No Leaks: Leave that ¼-inch border when spreading the filling, and press the sandwich edges firmly before coating to create a seal.
Common Mistake: Overloading the sandwiches with too much filling causes blowouts during frying—use about 2-3 tablespoons of cream cheese per sandwich.
Test Kitchen Discovery: Adding a splash of heavy cream to the cream cheese filling creates an even silkier texture that’s closer to actual cheesecake.
Customization Ideas
Dietary Modifications:
- Gluten-Free: Use thick gluten-free bread and gluten-free flour for coating
- Lower Sugar: Reduce powdered sugar in the filling to 2 tablespoons and use sugar-free jam
- Dairy-Free: Use vegan cream cheese and plant-based butter for frying
Flavor Variations:
- Chocolate Lover: Add 2 tablespoons cocoa powder to the cream cheese filling and use Nutella instead of jam
- Mixed Berry: Combine strawberries with blueberries and raspberries, use mixed berry preserves
- Lemon Zest: Add 1 teaspoon lemon zest to the cream cheese for bright, tangy flavor
- Caramel Drizzle: Top finished sandwiches with warm caramel sauce instead of powdered sugar
- Cinnamon Sugar Coating: Roll warm sandwiches in cinnamon-sugar mixture instead of powdered sugar
Serving Styles:
- Classic Breakfast: Serve with crispy bacon and fresh fruit salad
- Elegant Dessert: Plate individually with whipped cream rosettes and fresh berry garnish
- Ice Cream Sandwich: Let cool slightly and serve with a scoop of vanilla ice cream between two halves
Storage & Meal Prep
Make Ahead:
- Prepare cream cheese filling up to 3 days ahead; store covered in refrigerator
- Assemble uncoated sandwiches up to 4 hours ahead; wrap tightly in plastic wrap and refrigerate
- Slice strawberries up to 1 day ahead; store in airtight container with paper towel to absorb moisture
Storing:
- Counter: Fried sandwiches are best eaten immediately; quality declines after 30 minutes as they lose crispness
- Fridge: Store leftover fried sandwiches in airtight container for up to 1 day
- Freezer: Not recommended—the cream cheese filling separates and becomes grainy when frozen and thawed
Reheating for Best Results:
Reheat in a 350°F oven for 5-7 minutes or in an air fryer at 350°F for 3-4 minutes to restore some crispness. Microwave makes them soggy, so oven or air fryer are your best options. Note that reheated versions will never match the just-fried texture.

What to Serve With Fried Strawberry Cheesecake Sandwiches
Perfect Pairings:
- Hot coffee or espresso: The bitter notes balance the sweet richness perfectly
- Fresh whipped cream: Add a dollop on the side for extra indulgence
- Vanilla ice cream: Serve alongside or on top for a warm-cold contrast
Complete the Meal:
- Serve with crispy bacon and scrambled eggs for an epic sweet-and-savory brunch spread
- Pair with fresh fruit salad and mimosas for an elegant brunch party
- Add to a dessert board with chocolate truffles and fresh berries for variety
Nutrition Facts (Per Serving)
Calories: 465 | Protein: 10g | Carbs: 52g | Fat: 24g | Fiber: 2g | Sugar: 28g | Sodium: 420mg
Note: Calculated based on recipe as written using brioche bread and full-fat ingredients. Nutrition varies based on specific brands and portion sizes.
Your Questions Answered
Can I make these without frying in butter?
Yes! You can bake them at 375°F for 12-15 minutes, flipping halfway, though they won’t be as crispy. Alternatively, use an air fryer at 350°F for 6-8 minutes for a lower-fat crispy option.
Why did my filling leak out during cooking?
This usually happens when there’s too much filling or the sandwich isn’t sealed properly. Leave a border when spreading, don’t overfill, and press edges firmly before coating.
What’s the best bread if I can’t find brioche?
Challah is the closest substitute. Texas toast or thick-sliced white bread also work, though they’re less rich and buttery than brioche.
Can I use frozen strawberries?
Fresh strawberries are strongly recommended because frozen ones release too much water and make the sandwiches soggy. If you must use frozen, thaw completely and pat very dry with paper towels first.
How do I keep the coating from falling off?
Make sure your egg wash coats completely, press the flour mixture firmly onto all surfaces, and let coated sandwiches rest for 2-3 minutes before frying to help the coating adhere.
Can I make these ahead for a party?
You can assemble uncoated sandwiches up to 4 hours ahead and refrigerate, but fry them just before serving for the best texture. Once fried, they lose crispness quickly.
Recipe History & Cultural Context
Fried dessert sandwiches have roots in various culinary traditions—from French pain perdu (lost bread) to Monte Cristo sandwiches that blur the line between sweet and savory. The concept of stuffing bread with cream cheese and fruit, then frying it, gained popularity in the 2010s as food trucks and brunch spots started experimenting with elevated comfort foods.
These particular strawberry cheesecake sandwiches represent the American love affair with transforming classic desserts into portable, handheld formats. By deconstructing cheesecake—one of America’s most beloved desserts—and reimagining it as a fried sandwich, home cooks created something that delivers all the flavors and textures we crave in a fraction of the time.
The recipe exploded on social media around 2020-2021, with home bakers sharing golden, powdered-sugar-dusted creations that looked as Instagram-worthy as they tasted indulgent. What makes this recipe endure is its versatility—it works for breakfast, brunch, dessert, or an afternoon treat, and it’s fancy enough for company but easy enough for a weekday splurge. The combination of warm, crispy exterior with cool, creamy interior creates a sensory experience that keeps people coming back to make them again and again.
Printable Recipe Card
Fried Strawberry Cheesecake Sandwiches
Crispy golden brioche stuffed with cream cheese and fresh strawberries—ready in 20 minutes!
Ingredients:
Filling:
- 8 oz cream cheese, softened
- ¼ cup powdered sugar
- 1 tsp vanilla extract
Sandwiches:
- 8 slices brioche bread
- 1 cup fresh strawberries, sliced
- ½ cup strawberry jam
- 2 tbsp butter for frying
Coating:
- 2 eggs, beaten
- ¼ cup milk
- ½ cup flour
- ½ tsp cinnamon
- ¼ tsp salt
- ¼ cup granulated sugar
- Powdered sugar for dusting
Instructions:
- Beat cream cheese, powdered sugar, and vanilla until smooth and fluffy
- Spread cream cheese on 4 bread slices, top with strawberries and jam, cover with remaining bread
- Set up coating stations: flour-cinnamon mixture in one bowl, egg-milk mixture in another
- Dip each sandwich in egg mixture, then dredge in flour mixture to coat completely
- Melt butter in skillet over medium heat and fry sandwiches 2-3 minutes per side until golden
- Drain on paper towels, sprinkle with granulated sugar, dust with powdered sugar, and serve warm
Notes:
- Cream cheese must be at room temperature for smooth filling
- Leave ¼-inch border when spreading filling to prevent leaking
- Best served immediately while crispy; texture declines as they cool