Cast Iron Skillet Banana Bread: A Rustic Twist on a Classic Favorite
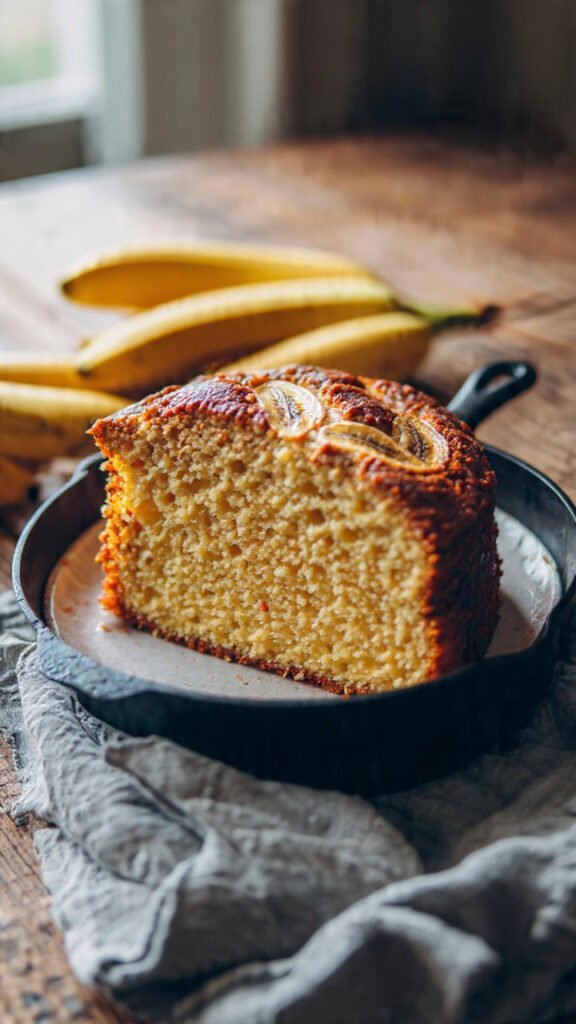
There’s something magical about baking banana bread in a cast iron skillet. The heavy pan creates a beautifully crisp, golden crust around the edges while keeping the center impossibly moist and tender. This isn’t your typical loaf pan banana bread—this is comfort food with character, rustic charm, and edges so deliciously caramelized that they might just become everyone’s favorite part.
If you’ve been letting overripe bananas languish on your counter, wondering what to do with them, this recipe is your answer. It’s simple enough for beginner bakers yet impressive enough to serve at a weekend brunch. The cast iron skillet does most of the heavy lifting, transforming basic ingredients into something that looks bakery-worthy and tastes even better.
Why Cast Iron Makes All the Difference
Cast iron skillets have been kitchen workhorses for generations, and there’s good reason they’ve stood the test of time. When it comes to baking banana bread, cast iron offers several distinct advantages over traditional loaf pans.
First, the even heat distribution creates consistent baking throughout. The thick walls of a cast iron skillet heat slowly and retain that heat beautifully, which means your banana bread bakes evenly from edge to center. You won’t find raw spots or overcooked sections—just perfectly baked bread every time.
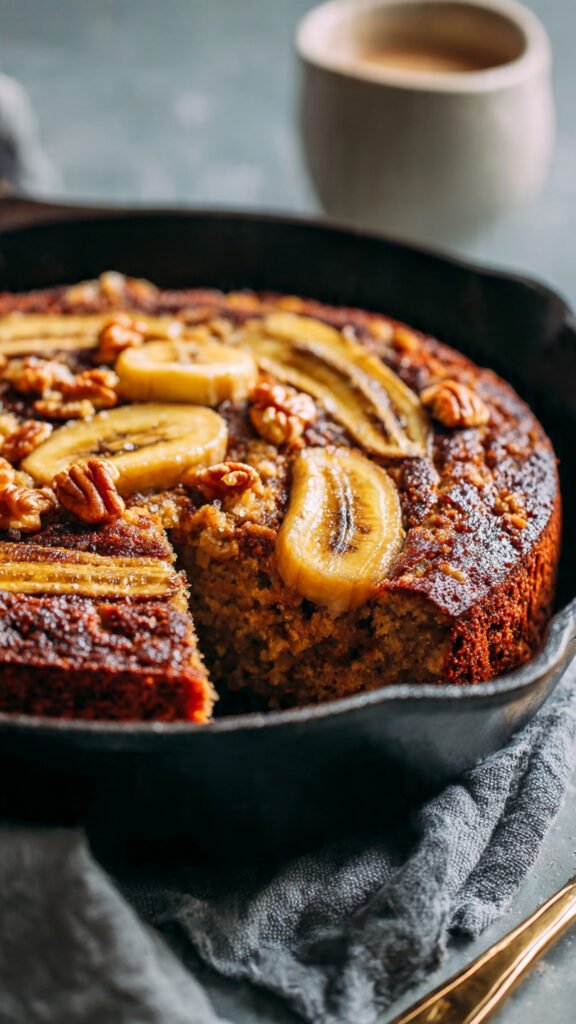
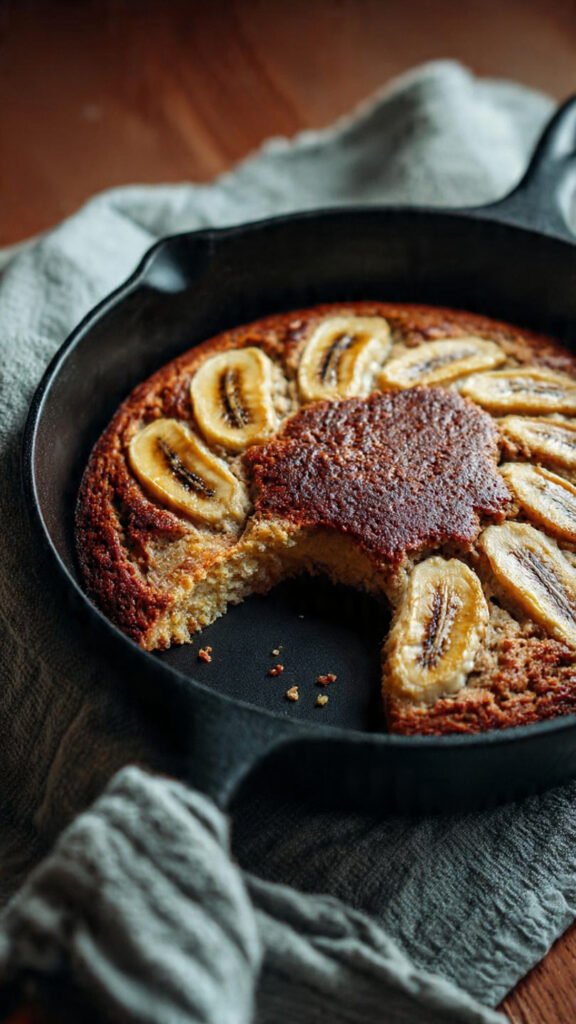
Second, that signature crust is something special. The edges develop a golden, slightly crispy exterior that contrasts beautifully with the soft, cake-like interior. It’s the kind of texture combination that makes each slice interesting and satisfying.
Finally, there’s the presentation factor. Serving banana bread straight from a cast iron skillet adds rustic charm to any table. Whether you’re hosting a casual coffee date or a weekend breakfast, bringing that skillet to the table creates an inviting, homey atmosphere that guests love.
Choosing Your Bananas
The secret to exceptional banana bread starts long before you preheat the oven—it begins with banana selection. For this recipe, you want bananas that are very ripe, covered in brown spots, and maybe even starting to look a little past their prime. Those brown-speckled bananas that you might consider too far gone for eating are actually perfect for baking.
As bananas ripen, their starches convert to sugars, making them sweeter and more flavorful. The darker the peel, the sweeter and more aromatic the banana becomes. These ultra-ripe bananas also mash more easily, creating a smoother batter with better texture.
If your bananas aren’t quite ripe enough, you can speed up the process by placing them in a paper bag for a day or two. The ethylene gas they produce will accelerate ripening. In a pinch, you can also bake unpeeled bananas at 300°F for 15-20 minutes until the skins turn black, though naturally ripened bananas will always yield the best flavor.
The Role of Each Ingredient
This banana bread recipe keeps things beautifully simple, but each ingredient plays a specific role in creating the perfect texture and flavor. The granulated sugar provides sweetness while helping to create a tender crumb. Oil keeps the bread moist and prevents it from drying out, even if you reheat slices later.
The sour cream might seem like an unexpected addition, but it’s a game-changer. It adds moisture, creates tenderness, and provides a subtle tang that balances the sweetness of the bananas and sugar. If you don’t have sour cream on hand, Greek yogurt works as an excellent substitute.
Baking soda acts as the leavening agent, reacting with the acidic components in the batter to create lift and a light, airy texture. The mashed bananas provide natural moisture, sweetness, and that distinctive banana flavor we’re after. All-purpose flour gives structure to the bread, creating the framework that holds everything together.
The optional chopped nuts add texture and a pleasant crunch. Walnuts and pecans are traditional choices, but you can experiment with almonds, hazelnuts, or even leave them out entirely for a nut-free version.
Preparing Your Skillet
Before you start mixing ingredients, take a moment to properly prepare your cast iron skillet. Greasing it well is crucial for ensuring your banana bread releases cleanly after baking. Use butter, shortening, or cooking spray, making sure to coat the bottom and sides thoroughly.
A 10-inch cast iron skillet is ideal for this recipe, creating banana bread with the perfect thickness—not too thin, not too thick. If you only have a 12-inch skillet, don’t worry. The recipe still works beautifully, though the bread will be slightly thinner and may require a few minutes less baking time.
One important note: don’t preheat your cast iron skillet for this recipe. Unlike some cast iron cooking techniques that benefit from a hot pan, banana bread needs to bake gradually from a room-temperature start. Adding batter to a hot skillet can cause the bottom to cook too quickly, resulting in burnt edges and an undercooked center.
Mixing the Perfect Batter
The mixing process for this banana bread couldn’t be simpler, but there’s one golden rule to remember: don’t overmix. When you combine the ingredients, stir just until everything comes together. You should still see a few small lumps and streaks of flour—that’s exactly what you want.
Overmixing develops the gluten in the flour, which creates a dense, tough texture instead of the tender, cake-like crumb that makes banana bread so irresistible. Think of it like muffin batter—a few lumps are your friends.
Mash your bananas with a fork until they’re fairly smooth with just a few small chunks remaining. These little pieces of banana throughout the bread add pockets of intense banana flavor and create interesting texture.
Baking to Perfection
Once your batter is in the prepared skillet, spread it evenly with a spatula. This ensures uniform baking and prevents one side from rising higher than the other. Pop the skillet into a preheated 350°F oven and let the magic happen.
The baking time ranges from 30 to 40 minutes depending on your oven and the size of your skillet. Start checking around the 30-minute mark by inserting a toothpick into the center. When it comes out clean or with just a few moist crumbs clinging to it, your banana bread is done.
The edges should be golden brown and pulling slightly away from the sides of the skillet. The top should spring back when lightly pressed with your finger. These visual cues, combined with the toothpick test, ensure perfect results every time.
Cooling and Serving
Resist the temptation to cut into your banana bread immediately after removing it from the oven. Letting it cool for at least 10-15 minutes allows the structure to set, making slicing much easier and cleaner. The bread continues to cook slightly as it cools, and cutting too early can result in gummy texture.
When you’re ready to serve, you have options. Slice the banana bread into wedges like a pie, or cut it into squares for a more casual presentation. Serve it warm with butter melting into each slice, or enjoy it at room temperature with a cup of coffee or tea.
Storage and Make-Ahead Tips
This cast iron skillet banana bread stays moist for several days when properly stored. Once completely cooled, cover the skillet with plastic wrap or transfer slices to an airtight container. The bread will keep at room temperature for 2-3 days or in the refrigerator for up to a week.
For longer storage, this banana bread freezes beautifully. Wrap individual slices in plastic wrap, then place them in a freezer bag. Frozen slices keep for up to three months and can be thawed at room temperature or warmed in the microwave for a quick breakfast or snack.
Variations to Try
Once you’ve mastered the basic recipe, experiment with variations. Fold in chocolate chips for a sweeter treat, add a teaspoon of cinnamon or nutmeg for warm spice notes, or swirl in a ribbon of cream cheese for extra richness. You could also top the batter with a streusel mixture before baking for added texture and sweetness.
This versatile recipe adapts easily to your preferences and what you have on hand, making it perfect for regular rotation in your baking repertoire.
Equipment
- Cast Iron Skillet (10-inch preferred)
- Mixing Bowls
- Measuring cups and spoons
- Fork for mashing bananas
- Spatula for spreading batter
Ingredients
- ¾ cup granulated sugar
- ½ cup oil
- 3 tablespoons sour cream
- 2 large eggs
- 1 teaspoon baking soda
- 3 bananas, mashed
- 2 cups all-purpose flour
- ½ cup chopped nuts (optional)
Instructions
Grease a cast iron skillet well. A 10-inch skillet works best, though a 12-inch skillet also works.
In a mixing bowl, combine all ingredients and stir just until combined. The batter should still have a few lumps.
Pour the batter into the prepared skillet and spread evenly with a spatula.
Bake at 350°F for 30-40 minutes, or until a toothpick inserted into the center comes out clean. The edges should be golden brown.
Remove from the oven and cool for at least 10-15 minutes before slicing. Serve warm or at room temperature.
Recipe Notes
For best flavor, use very ripe bananas with plenty of brown spots. The darker the peel, the sweeter and more flavorful your banana bread will be.
A 10-inch cast iron skillet creates the ideal thickness, but a 12-inch skillet works too. Just reduce the baking time by a few minutes and watch for doneness.
Do not preheat the skillet—simply grease it well before adding the batter. This prevents the bottom from cooking too quickly.
Stir the batter just until combined to avoid dense banana bread. A few lumps are perfectly fine and will disappear during baking.
This banana bread slices best after cooling for a few minutes. It also freezes beautifully for up to three months.
Nutrition Information
Serving: 1 slice | Calories: 247kcal | Carbohydrates: 35g | Protein: 4g | Fat: 11g | Saturated Fat: 1g | Polyunsaturated Fat: 3g | Monounsaturated Fat: 6g | Trans Fat: 0.04g | Cholesterol: 28mg | Sodium: 105mg | Potassium: 145mg | Fiber: 1g | Sugar: 16g | Vitamin A: 68IU | Vitamin C: 3mg | Calcium: 13mg | Iron: 1mg