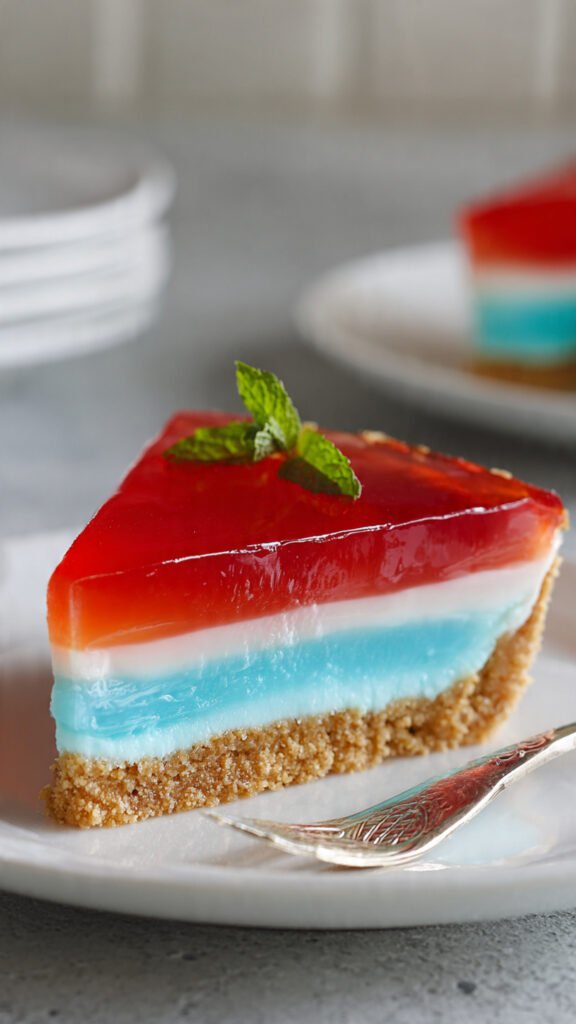
Rainbow Layered Jello Pie
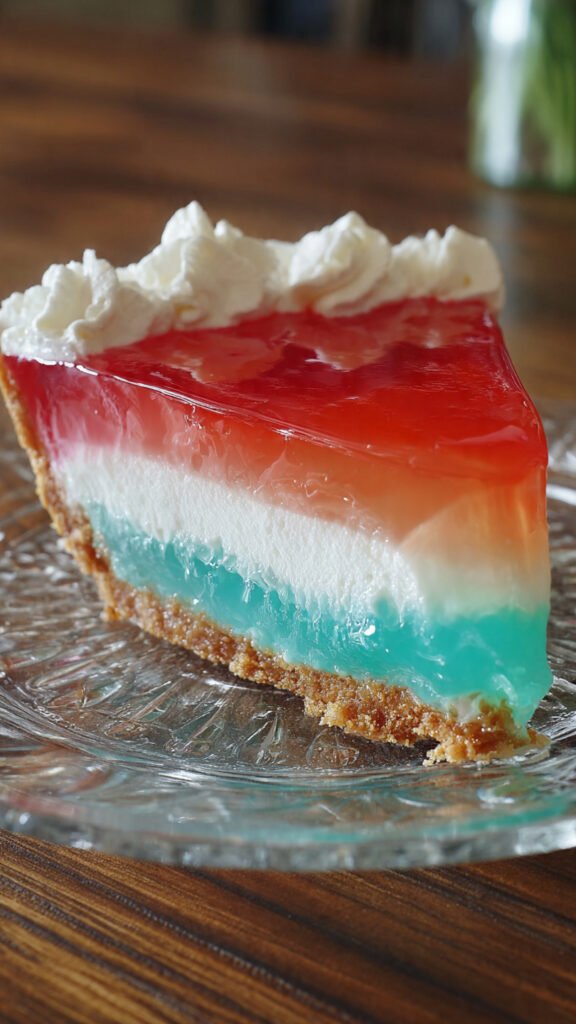
When temperatures rise and you’re craving something sweet but don’t want to turn on the oven, this spectacular Rainbow Layered Jello Pie becomes your best friend in the kitchen. This show-stopping dessert combines the nostalgic appeal of jello with the creamy richness of whipped topping, all nestled in a buttery graham cracker crust. The result? A cool, refreshing treat that’s as beautiful as it is delicious.
What makes this pie truly special is its stunning visual presentation. Three vibrant layers of fluffy jello cream create a gradient effect that’s sure to impress at any gathering, from backyard barbecues to birthday celebrations. Despite its impressive appearance, this dessert requires no baking and comes together with simple, accessible ingredients you can find at any grocery store.
The texture is what sets this pie apart from traditional gelatin desserts. By folding whipped cream into partially set jello, you create an airy, mousse-like consistency that’s far more sophisticated than basic jello. Each layer is light yet satisfying, offering a perfect balance of sweetness and creaminess that appeals to both kids and adults alike.
Essential Ingredients
For the Graham Cracker Crust
- 2 packages graham cracker sheets (about 3 cups when crushed)
- 10 tablespoons unsalted butter, melted
- Pinch of salt (optional, to enhance flavor)
For the Jello Layers
- 1 box (3 ounces) strawberry or cherry jello powder
- 1 box (3 ounces) orange jello powder
- 1 box (3 ounces) lemon jello powder
- 3 cups boiling water (divided)
- 3 cups cold water (divided)
- 24 ounces whipped topping (divided into three 8-ounce portions)
For Color Enhancement
- Pink gel food coloring
- Orange gel food coloring
- Bright yellow gel food coloring
Optional Garnishes
- Additional whipped cream for topping
- Gold sanding sugar for sparkle
- Fresh fruit slices
Step-by-Step Instructions
Preparing the Perfect Crust
Begin by creating your graham cracker crust, which serves as the sturdy foundation for your colorful layers. If you have a food processor, add the graham cracker sheets and pulse them in short bursts until they transform into fine, even crumbs. The texture should resemble coarse sand with no large pieces remaining. This typically takes about 30-40 seconds of pulsing.
If you don’t own a food processor, don’t worry—there’s an equally effective low-tech method. Place your graham crackers in a large, sturdy zip-top bag, press out the air, and seal it tightly. Use a rolling pin to crush the crackers, rolling firmly and evenly across the bag until you achieve fine crumbs. This method takes a bit more elbow grease but works perfectly well.
Once your crumbs are ready, melt the butter in the microwave or on the stovetop until it’s completely liquid. Pour the melted butter into your crumbs and mix thoroughly. If using a food processor, pulse several times to incorporate. If mixing by hand, use a fork or your fingers to work the butter into every bit of the crumbs. The mixture is ready when it resembles wet sand and holds together when squeezed.
Transfer this mixture to a 10-inch deep-dish springform pan. The springform pan is crucial here—it allows you to remove the pie cleanly and showcase those beautiful layers. Press the crumb mixture firmly across the bottom of the pan, using your fingers or the bottom of a measuring cup to create an even layer. Then work the mixture up the sides of the pan, pressing firmly to ensure it stays in place. The crust should go as far up the sides as possible to contain your generous filling.
Place your prepared crust in the freezer while you make the filling. This chilling step is important—it firms up the butter, creating a stable base that won’t crumble when you add the jello layers.
Creating the Fluffy Jello Layers
Prepare three separate mixing bowls—one for each jello flavor. Empty each jello powder packet into its own bowl. Bring water to a rolling boil and measure out exactly 1 cup for each flavor. Pour the boiling water over each jello powder and whisk vigorously for about 2 minutes per bowl, ensuring every last granule dissolves completely. Any undissolved grains will create an unpleasant texture in your finished pie.
Add 1 cup of cold water to each bowl and stir well. This step stops the cooking process and begins the cooling. Transfer all three bowls to the refrigerator and let them chill for 40-50 minutes. You’re looking for a specific consistency here—the jello should be significantly thickened and jiggly, similar to raw egg whites, but not fully set. If it’s too liquid, your layers will blend together; if it’s too firm, the whipped cream won’t incorporate smoothly.
Once your jello reaches the perfect consistency, it’s time to create that signature fluffy texture. Add 8 ounces of whipped topping to each bowl. Using a whisk or electric mixer on low speed, gently fold the whipped cream into the thickened jello. Continue mixing until the cream is completely incorporated and no white streaks remain. The mixture should be light, airy, and uniform in texture.
Achieving Perfect Colors
While the jello powders provide a base color, adding food coloring creates those vibrant, Instagram-worthy hues. Icing colors (also called gel paste colors) work best for this recipe—they’re highly concentrated, don’t add extra liquid, and blend smoothly without streaking.
For the pink layer (using red jello), add just 2-3 drops of pink food coloring. Mix thoroughly and assess the color. Add more drops gradually, mixing well between additions, until you achieve your desired shade of pink.
Repeat this process with the yellow layer (using lemon jello) and orange food coloring, adding to the orange jello. Start conservatively with color—you can always add more, but you can’t take it away. Mix each bowl until the color is completely uniform with no streaks or uneven patches.
Assembling Your Masterpiece
Remove your chilled crust from the freezer. If your jello mixtures seem too thin and you’re worried about the layers bleeding into each other, pop them back in the fridge for 15-20 minutes to firm up slightly.
Pour the pink mixture into the crust first, using a spatula to spread it evenly across the bottom. Gently tap the pan on the counter a few times to release any air bubbles and ensure the layer is level.
Carefully spoon the yellow mixture over the pink layer, starting from the center and working outward. Pour slowly and gently to avoid breaking through to the layer below. Spread evenly with a spatula.
Finally, add the orange layer using the same gentle technique. Smooth the top with a spatula for a professional finish.
The Waiting Game
Transfer your assembled pie to the refrigerator and let it set for at least 3 hours, though overnight is even better. The jello needs this time to fully firm up and the layers to stabilize. Resist the urge to check on it too frequently—opening the fridge releases cold air and can slow the setting process.
When you’re ready to serve, run a thin knife around the edge of the pan before releasing the springform. This ensures clean edges. For an elegant presentation, pipe rosettes of whipped cream around the top edge and sprinkle with gold sanding sugar for a touch of glamour.
Storage and Make-Ahead Tips
This pie keeps beautifully in the refrigerator for up to 5 days when covered. The texture actually improves slightly after the first day as the flavors meld together. However, avoid freezing this dessert—gelatin doesn’t freeze well, and you’ll end up with a watery, grainy mess when it thaws.
For easy serving, make this pie the night before your event. It gives the layers plenty of time to set firmly, making slicing much cleaner and easier.
Customization Ideas
Feel free to experiment with different jello flavor combinations. Try lime, berry blue, and grape for a different color scheme, or stick with shades of pink and red for a romantic Valentine’s Day dessert. You can also use sugar-free jello to reduce calories, or substitute the graham cracker crust with crushed vanilla wafers or Oreos for a different flavor profile.